Stefanos Moschidis - SAP Certified Technical Consultant - How to use Legacy System Migration Workbench (LSMW)
-
The Legacy System Migration Workbench (abbreviated to LSMW from now on), is a convenient tool for transporting data extracted from existing information systems to a new SAP installation.
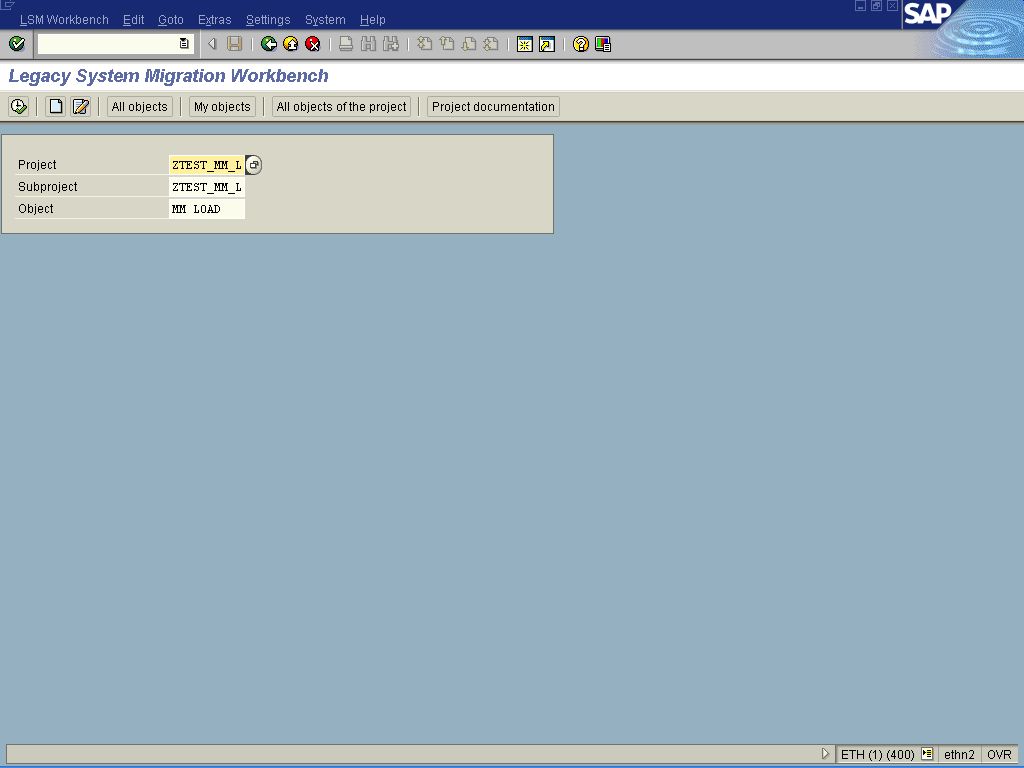
To use LSMW start the transaction LSMW. On the appearing screen type a Project name, a Subproject name and an Object Name. Press the Create Entry command button.

-
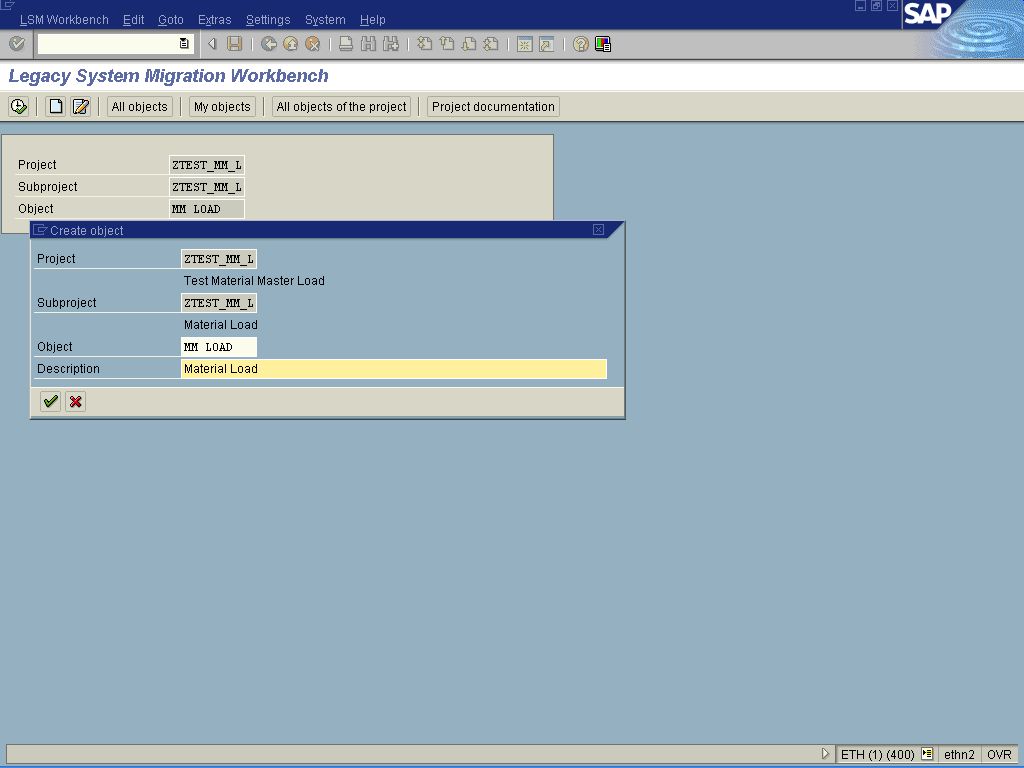
A popup window appears where the descriptions of Project, Subproject and Object are typed. Finally press the Continue command button.

-
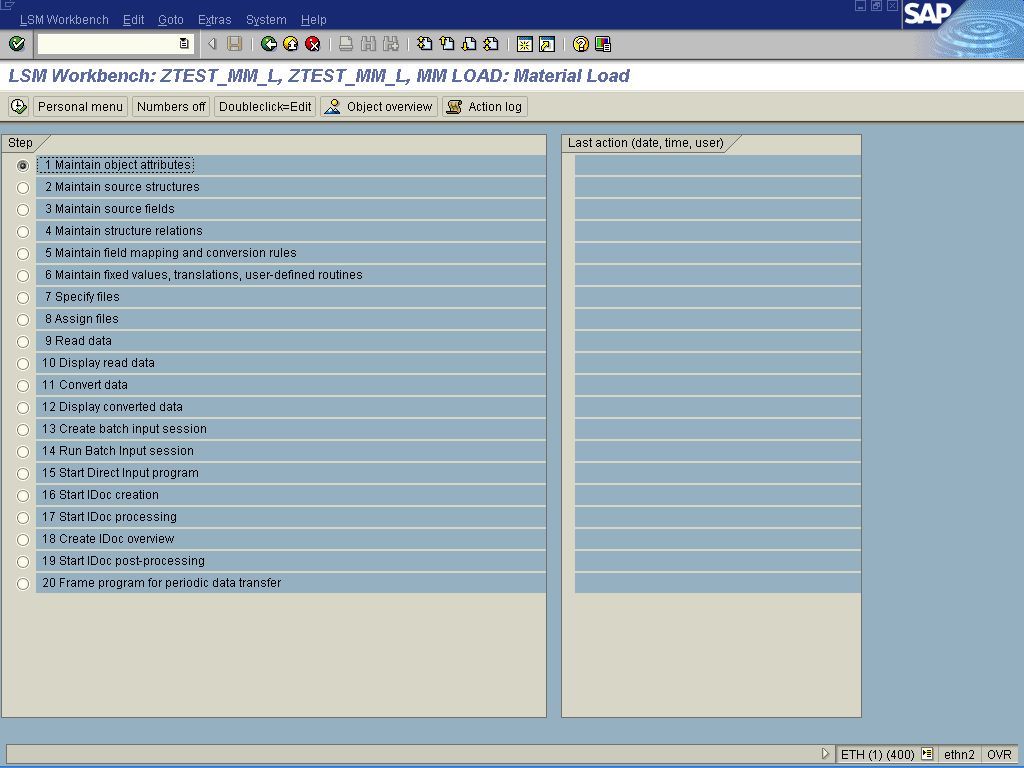
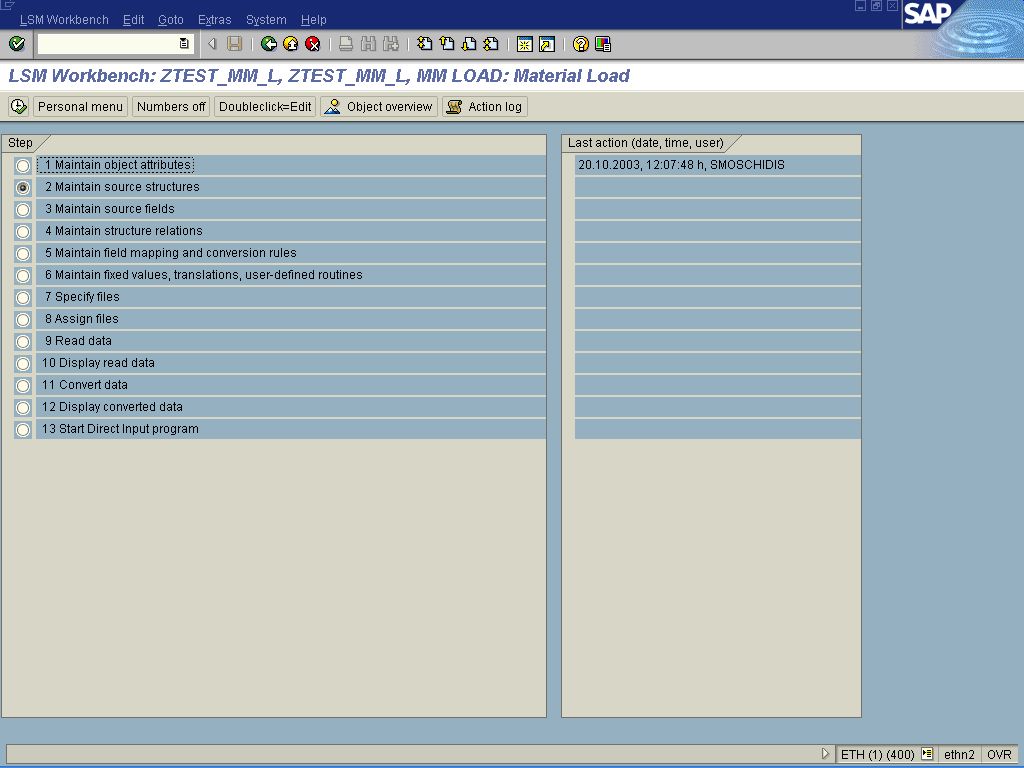
A screen appears with the table of the steps required for processing an LSMW Object (Ie a data transfer task). Each step can be executed by double mouse click. As a general rule these steps are executed in the order they appear on this table.
So, double click the step Maintain Object Attributes.
-
On the appearing screen of Object Attributes Maintenance select the radio button Standard Batch/Direct Input. Select the Object field press F4 key and from the appearing list of available entries select 0020 Material Master with double mouse click. Press the Save command button
 and the Back command button.

-
So, the step Maintain Object Attributes has been executed as shown on the screen and the next step Maintain Source Structures is selected. Double click this step.
-
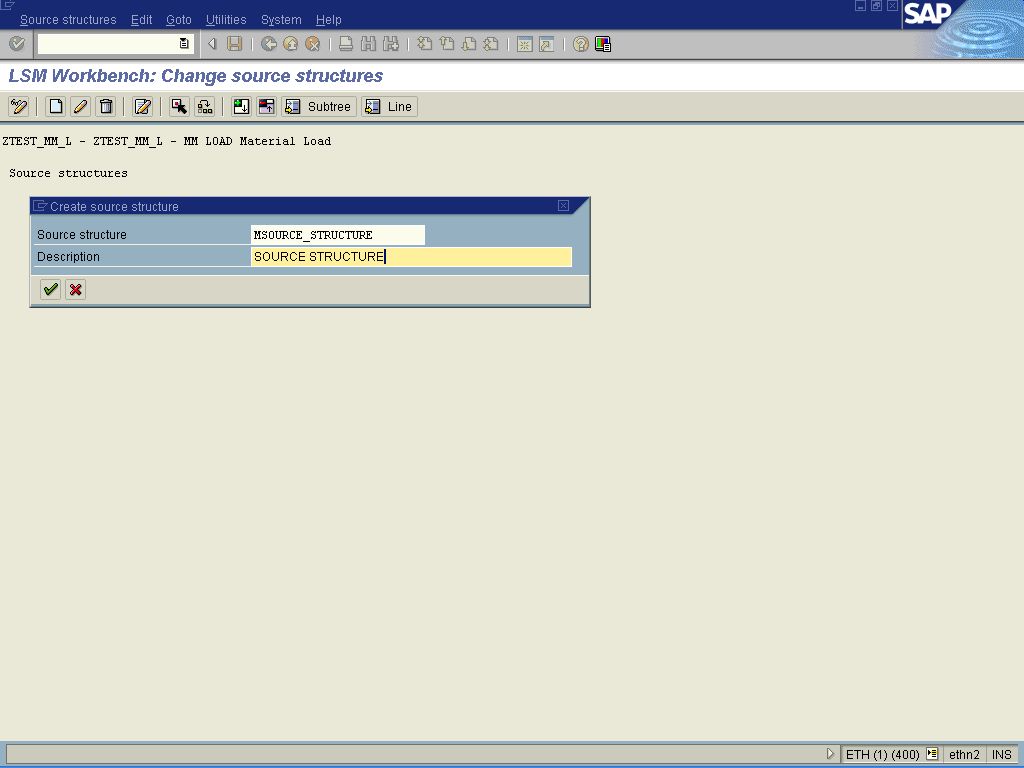
On the appearing screen of Maintaining Source Structures press the Create command button. A popup window appears where the name of the Source Structure and a description should be typed. Press the Save command button and the Back command button.
-
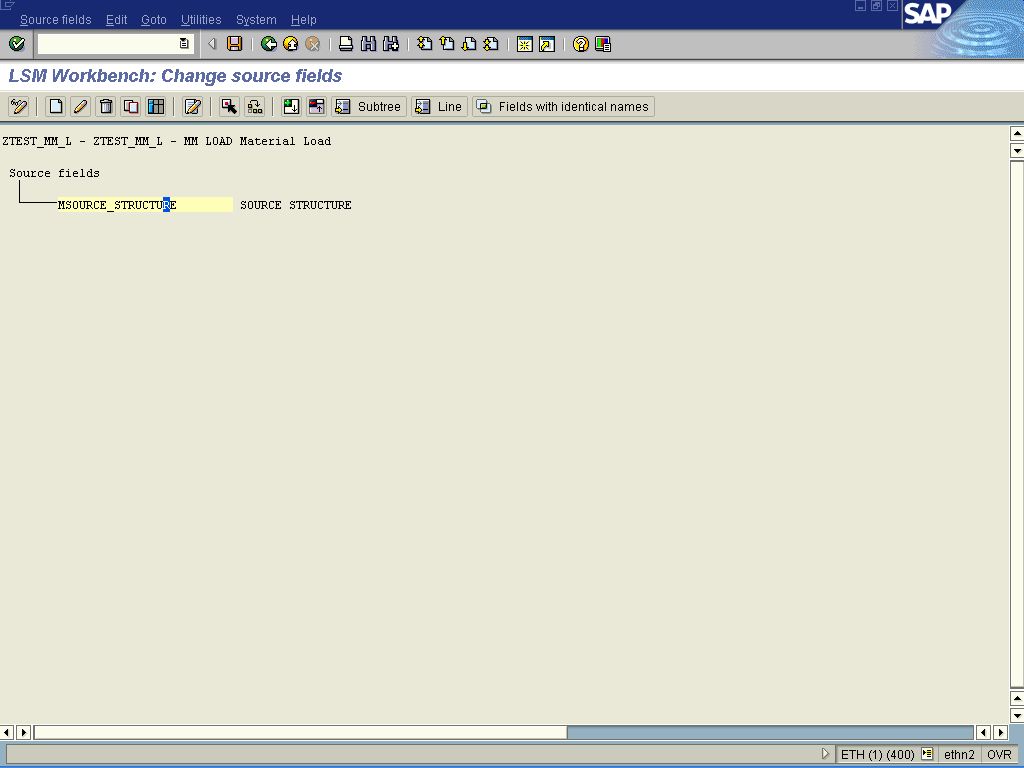
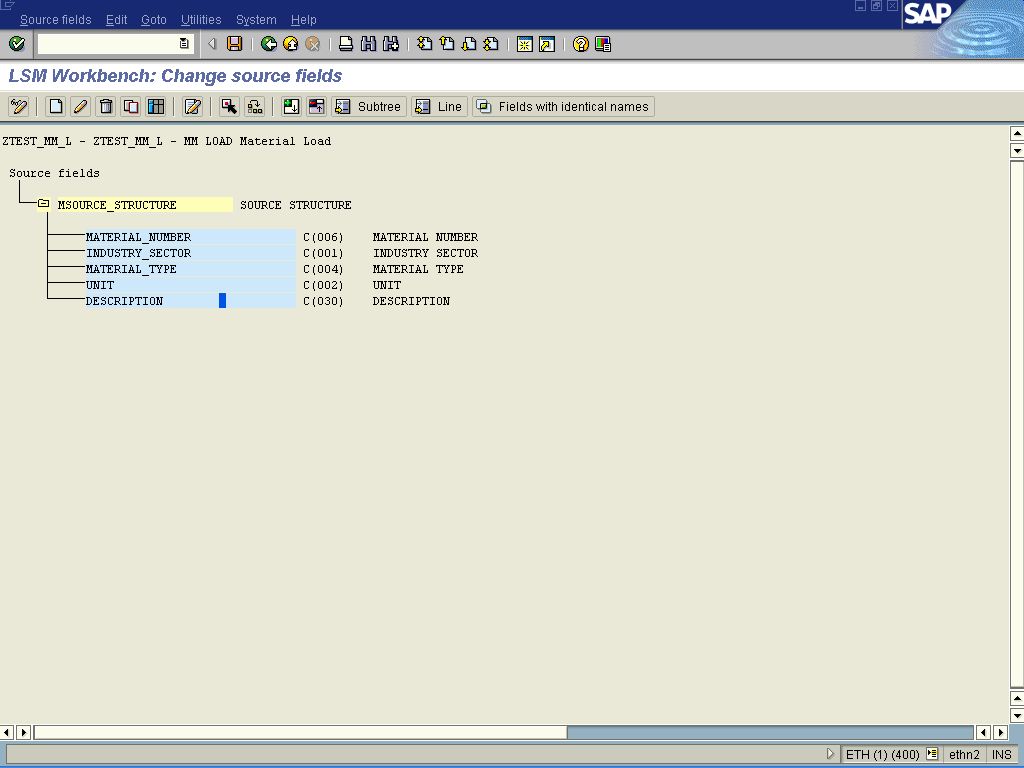
Select the next step Maintain Source Fields. On the appearing screen click the Source structure with the mouse and press the Create command button.
-
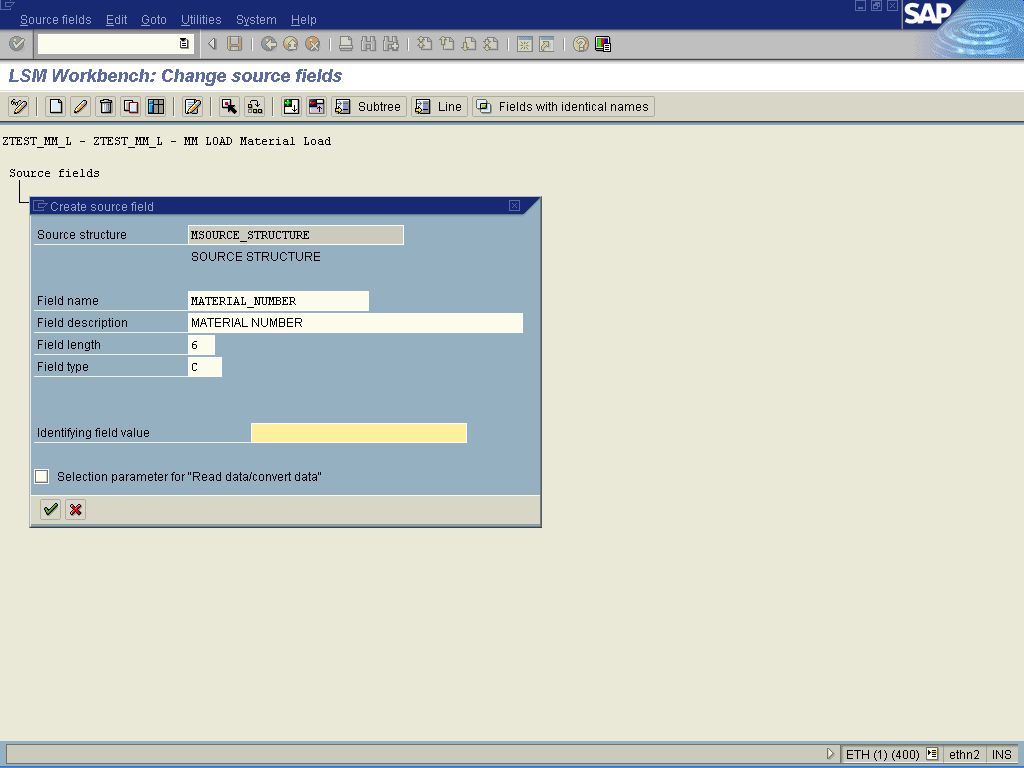
On the popup window of the new Source Field type a Name, a Description, a Length and a Type. Press the Continue command button. Repeat the process for all the fields comprising the Source Structure.
-
When all Source Fields are maintained press the Save command button and the Back command button.
-
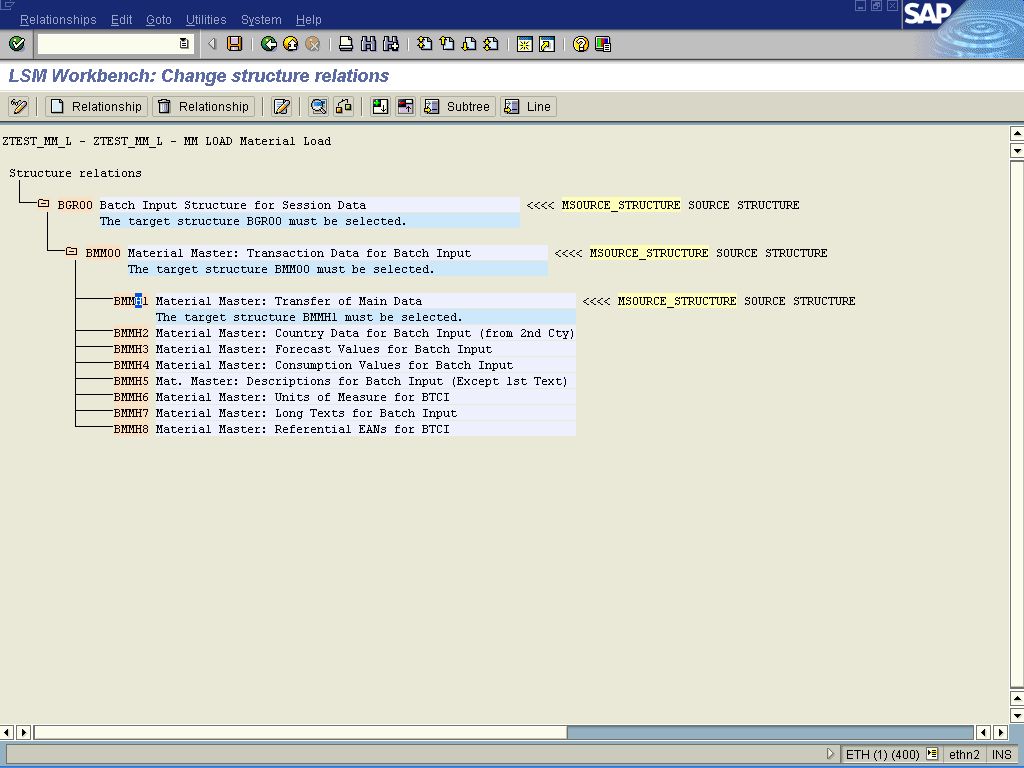
Select the next step, Maintain Structure Relations. A screen appears where the structures of the input file for direct input are displayed. Select a structure with the mouse button and press the Create Relationship command button.

-
When the relationships have been maintained press the Save command button and the Back command button.
(In this example only the first three structures of the input file for direct input must be related to the Source Structure).
-
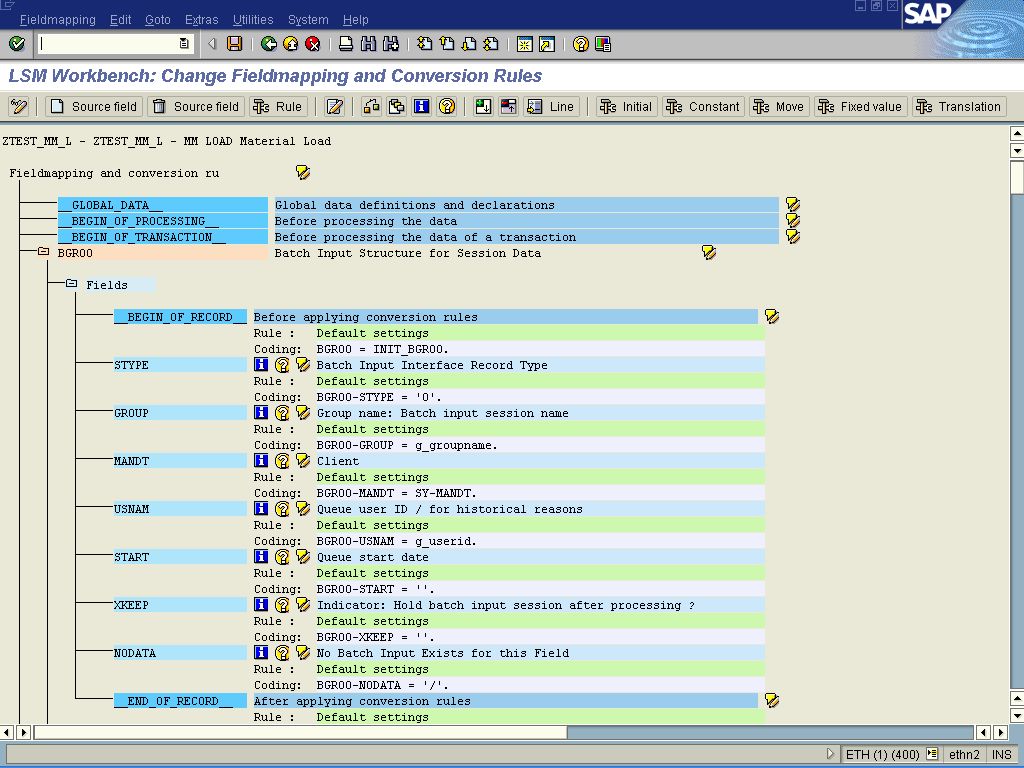
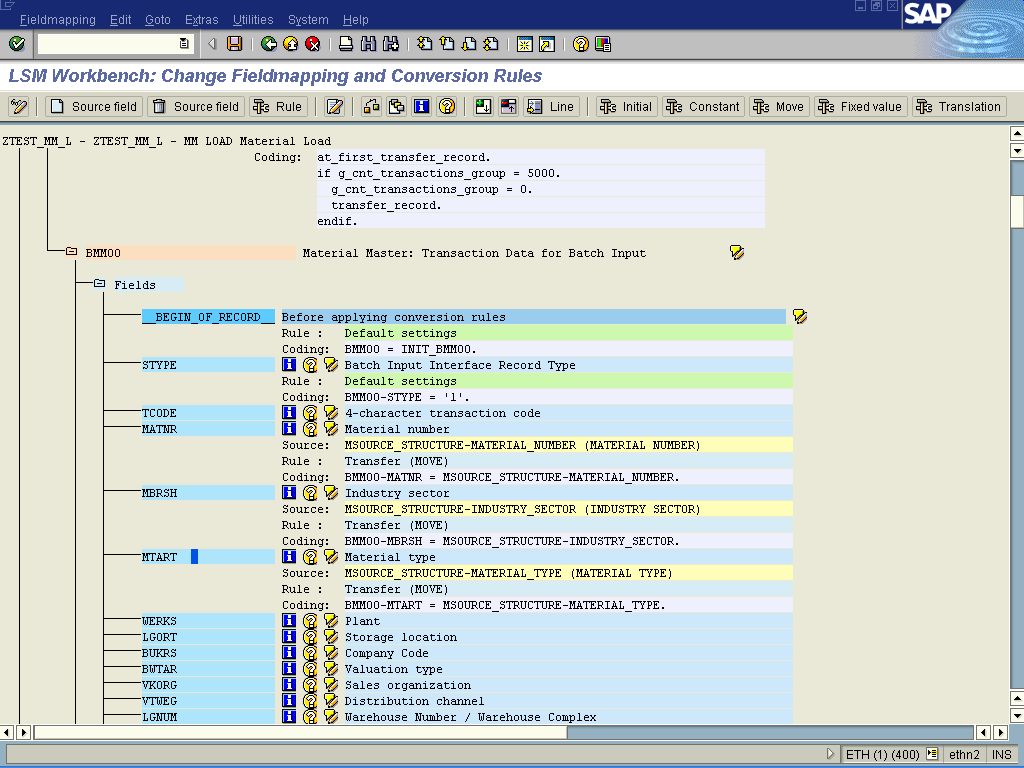
Select the next step, Maintain Field Mapping and Conversion Rules. Press page down key to show the structure BMM00.
-
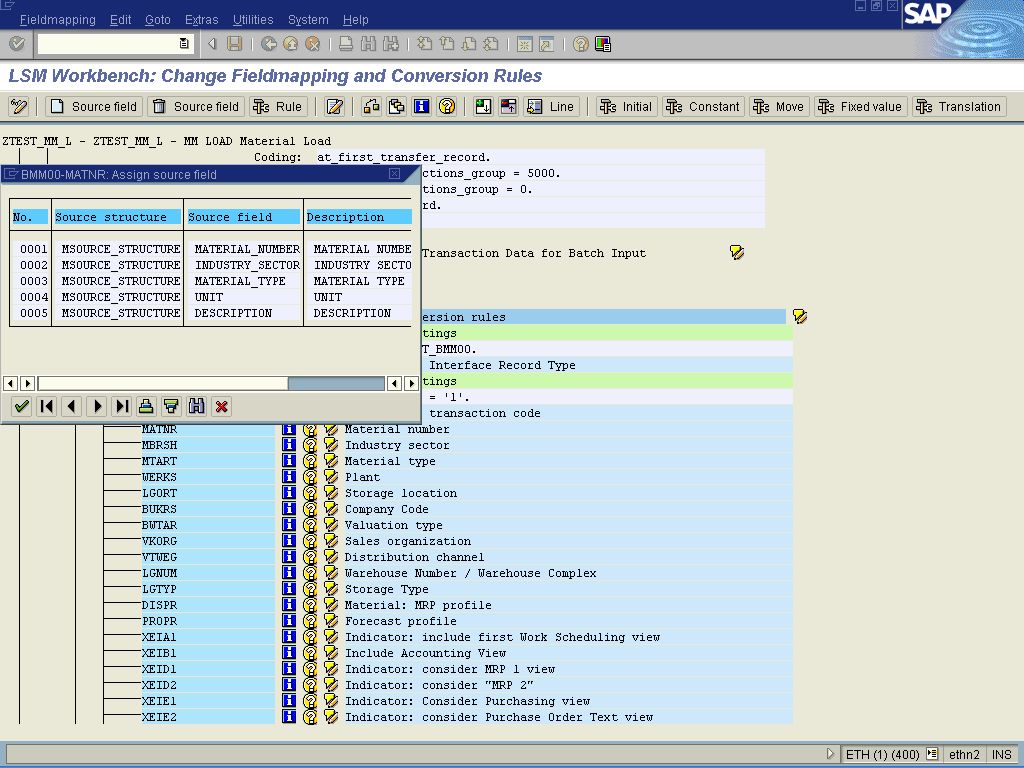
Select the field Material Number with a mouse click. Press the Create Source Field command button. A popup window appears where a field of the Source Structure can be selected and assigned with double mouse click. So, select the MATERIAL_NUMBER field.
-
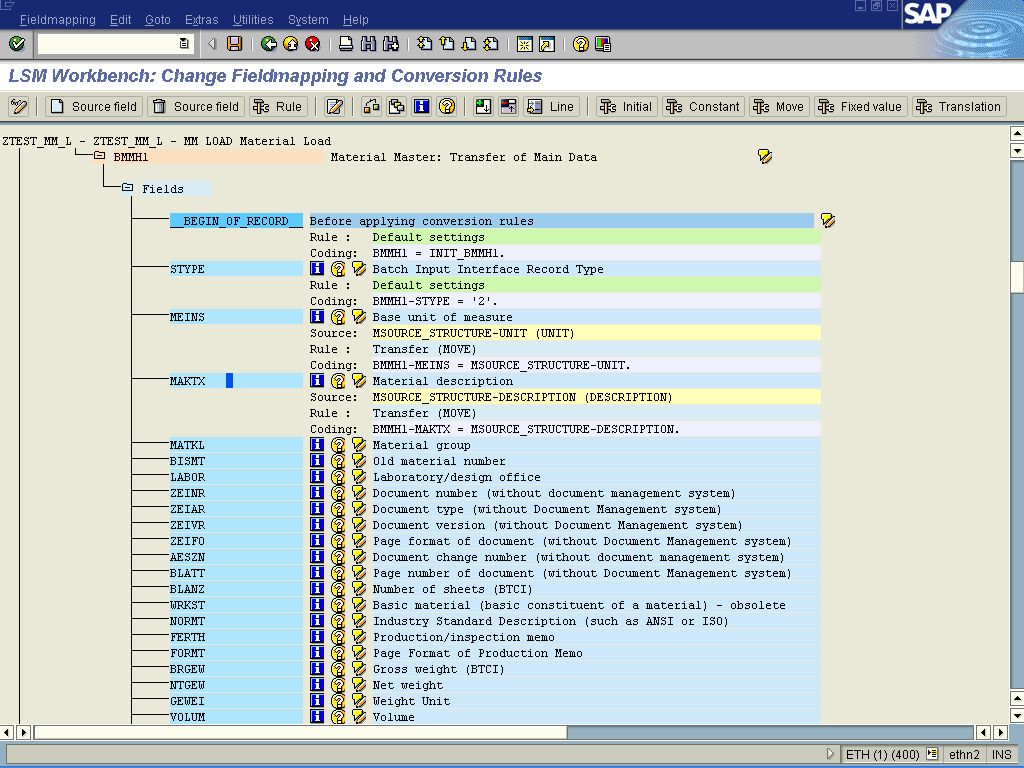
In the same way assign the INDUSTRY_SECTOR and the MATERIAL_TYPE fields. Press page down to locate the Unit and the Material description on the structure BMMH1.
-
Asign the UNIT and the DESCRIPTION fields. Press the Save command button and the Back command button.
-
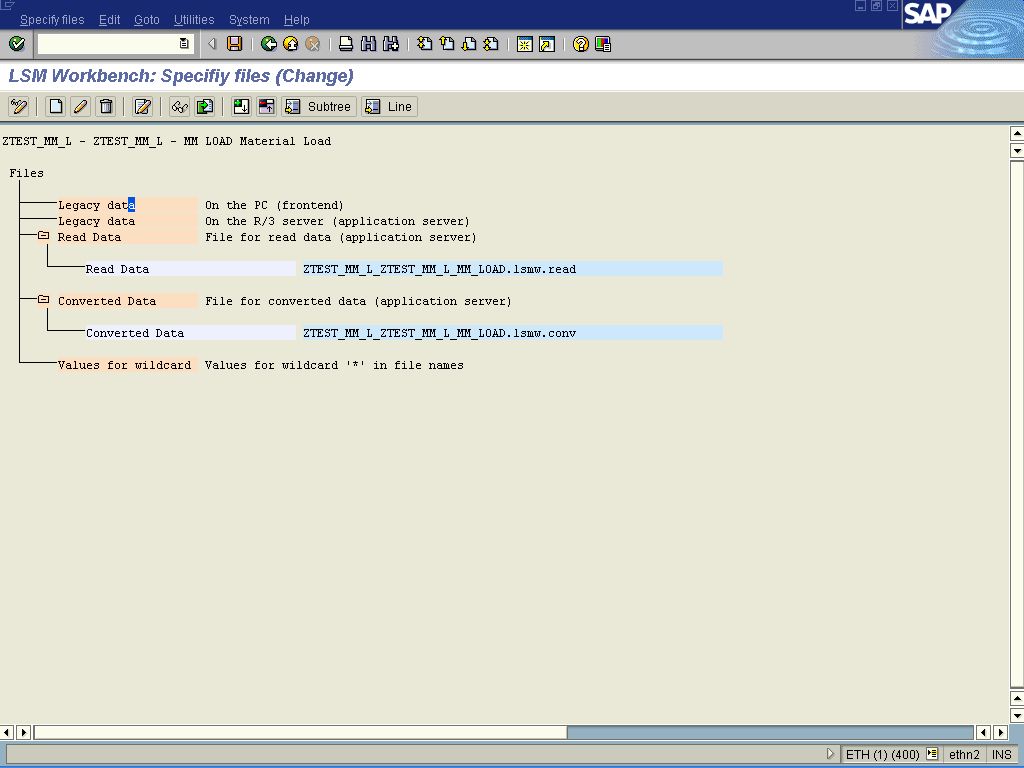
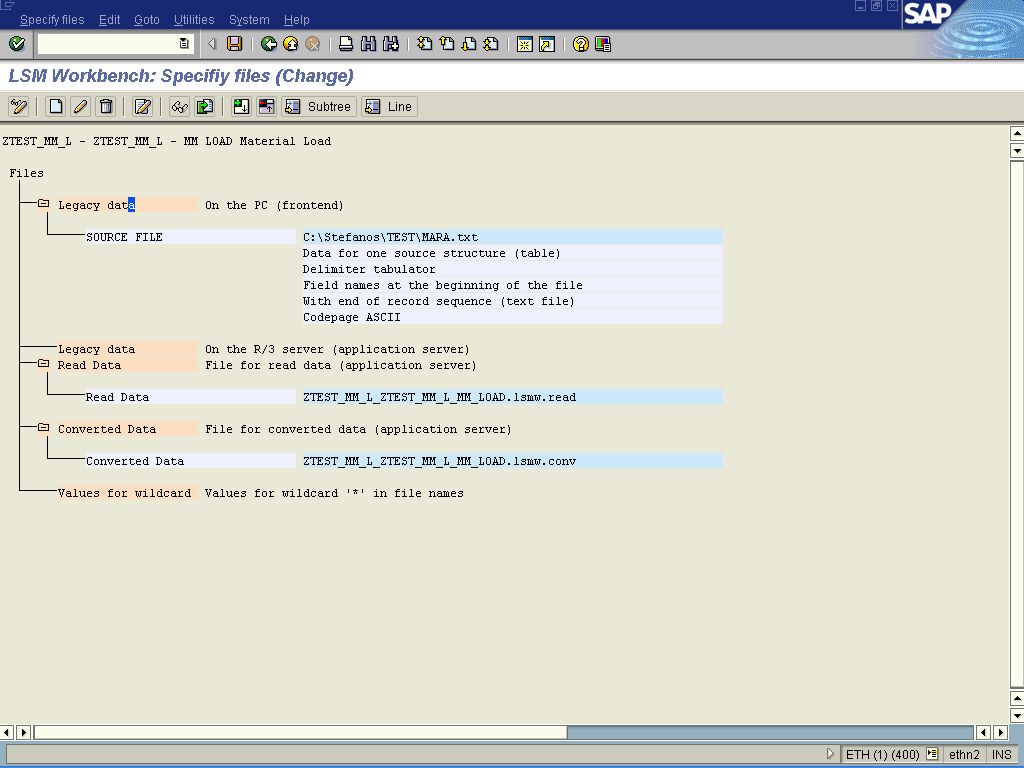
Select the next step, Specify Files. Select the line Legacy Data On the PC (frontend) with the mouse and press the Create command button.
-
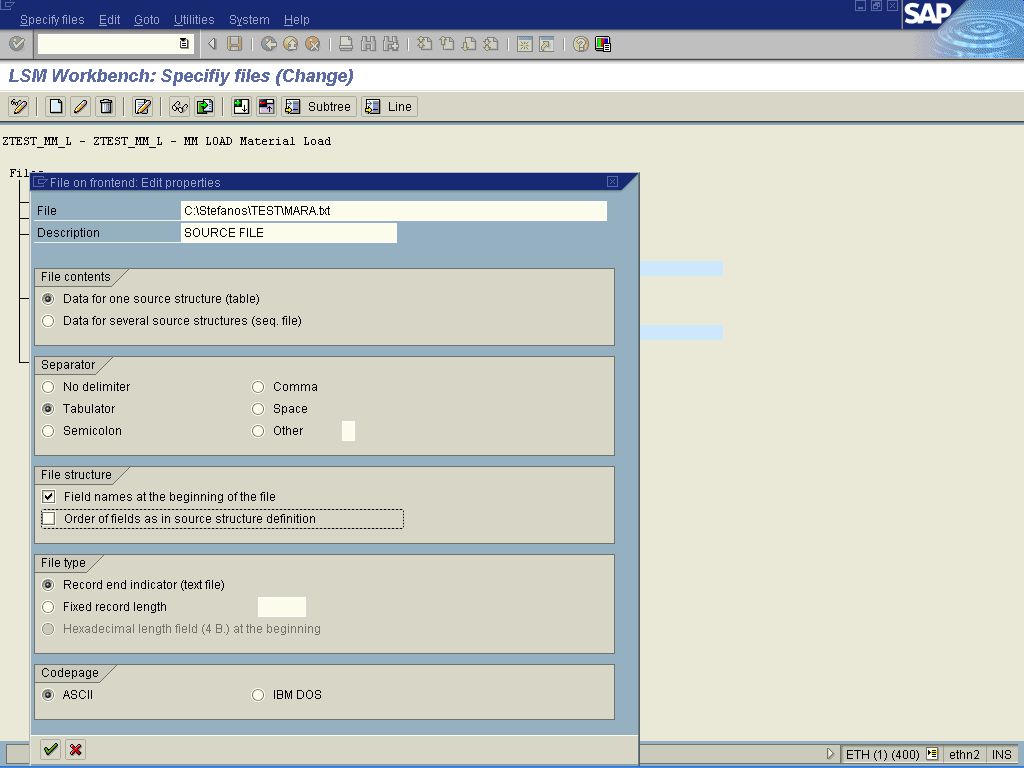
A popup window appears. Here specify the Path, the File Contents, the field Separator, the Field Structure, the File type and the Code Page. Press the Continue command button
-
So, the legacy data details are shown on the screen press the Save command button and the Back command button.
-
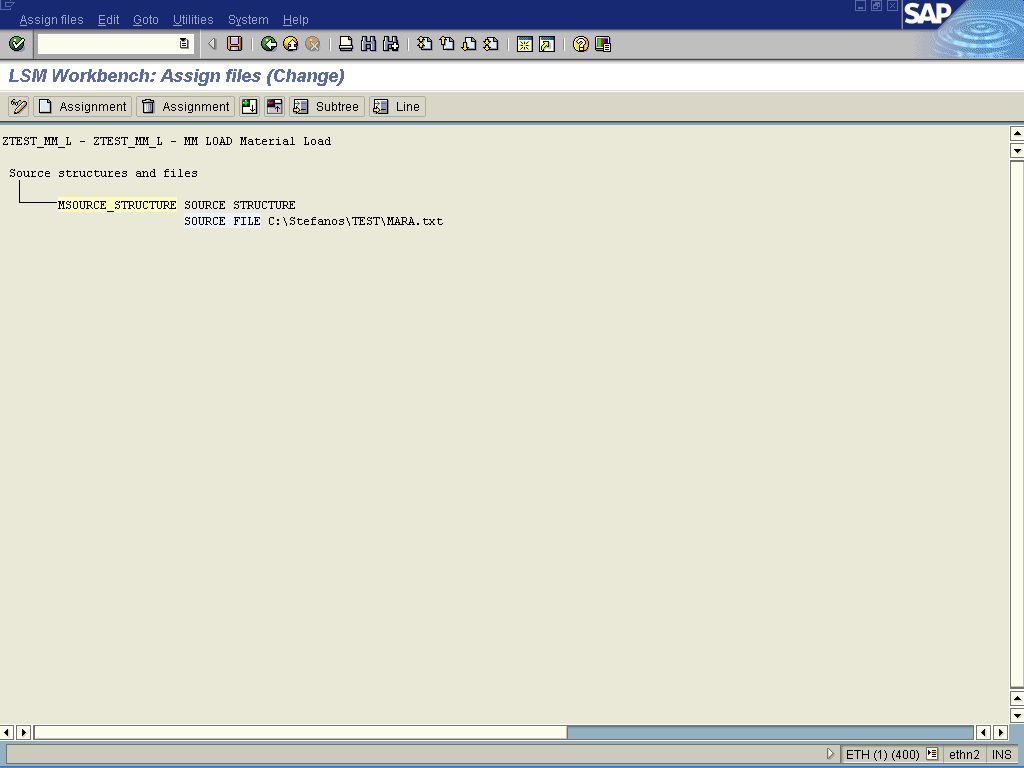
Select the next step, Assign files. On the appearing screen the input file on the frontend is assigned to the Source Structure. Press the Save command button and the Back command button.
-
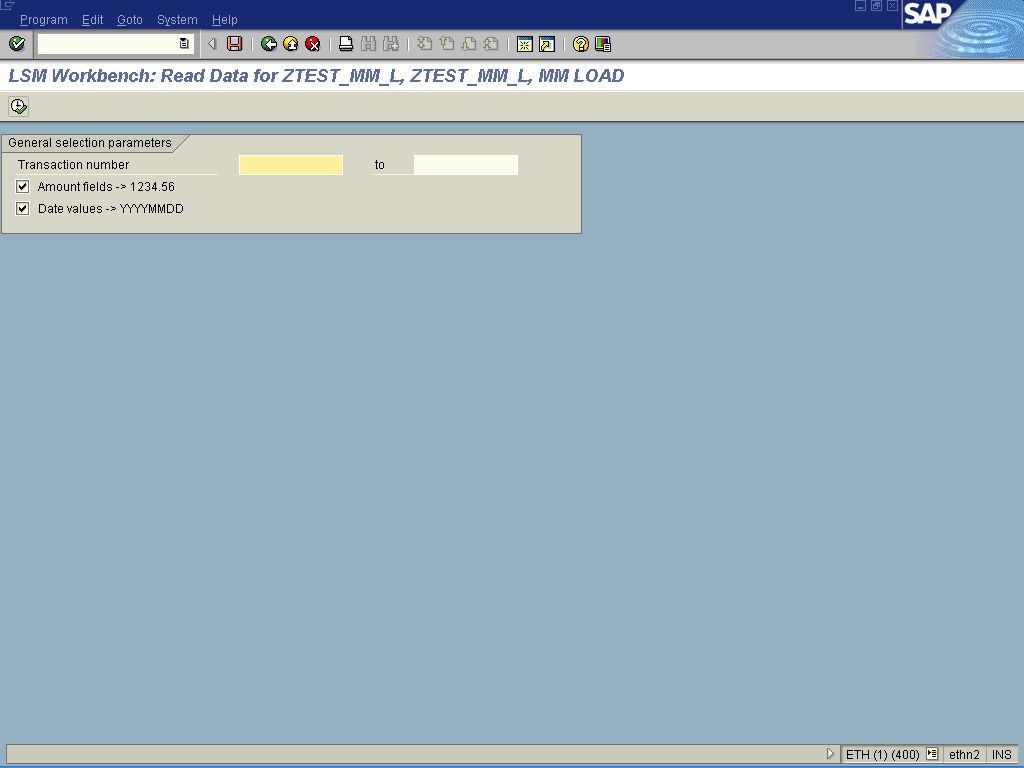
Select the next step, Read data. On the appearing selection screen press the Execute command button.

-
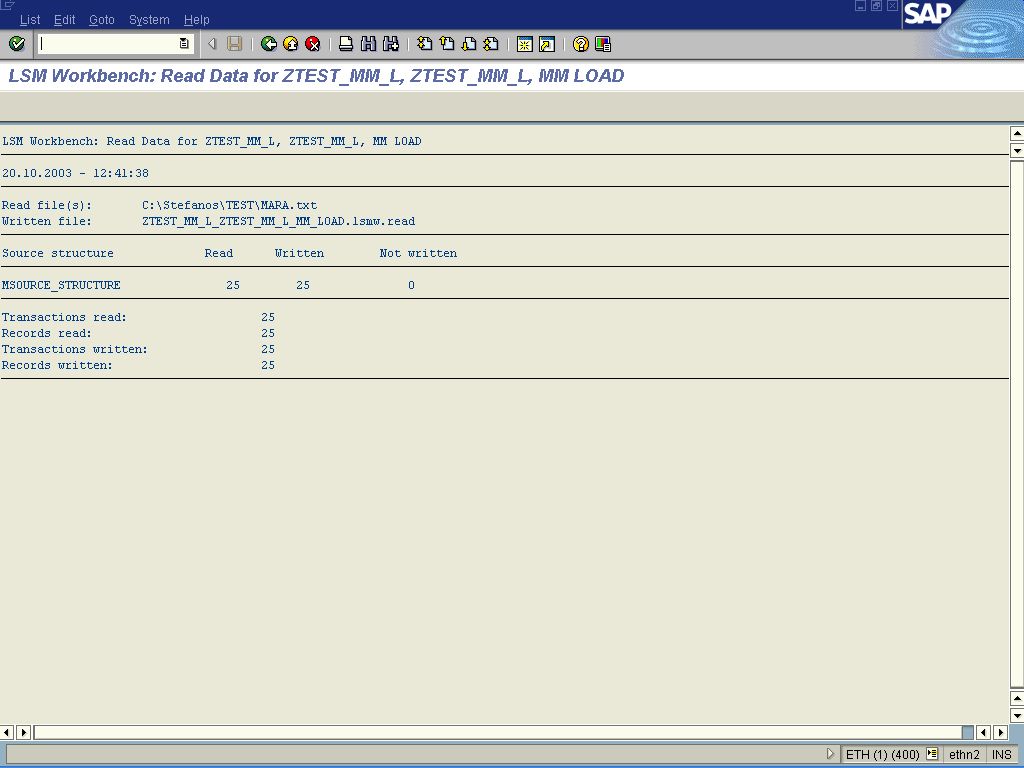
After reading the data a log is displayed showing the results of the reading process. Leave this screen with Back command button.
-
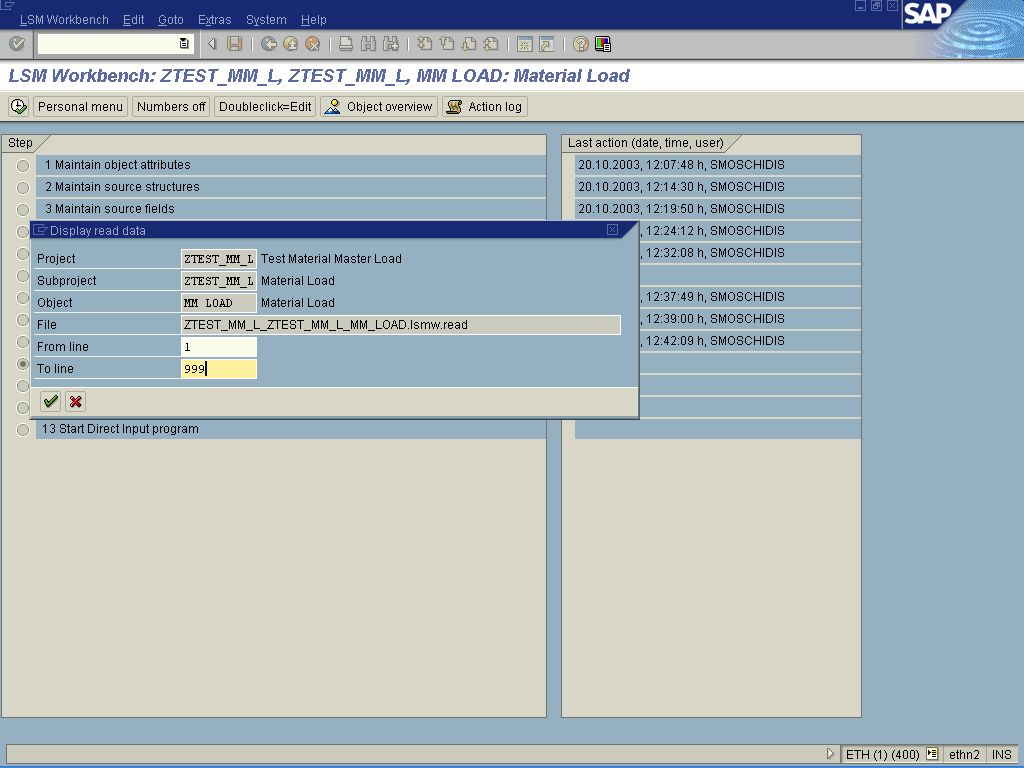
Select the next step, Display read data. A popup screen appears where a range of lines to be displayed can be selected. So, give a range of lines and press the Continue command button.
-
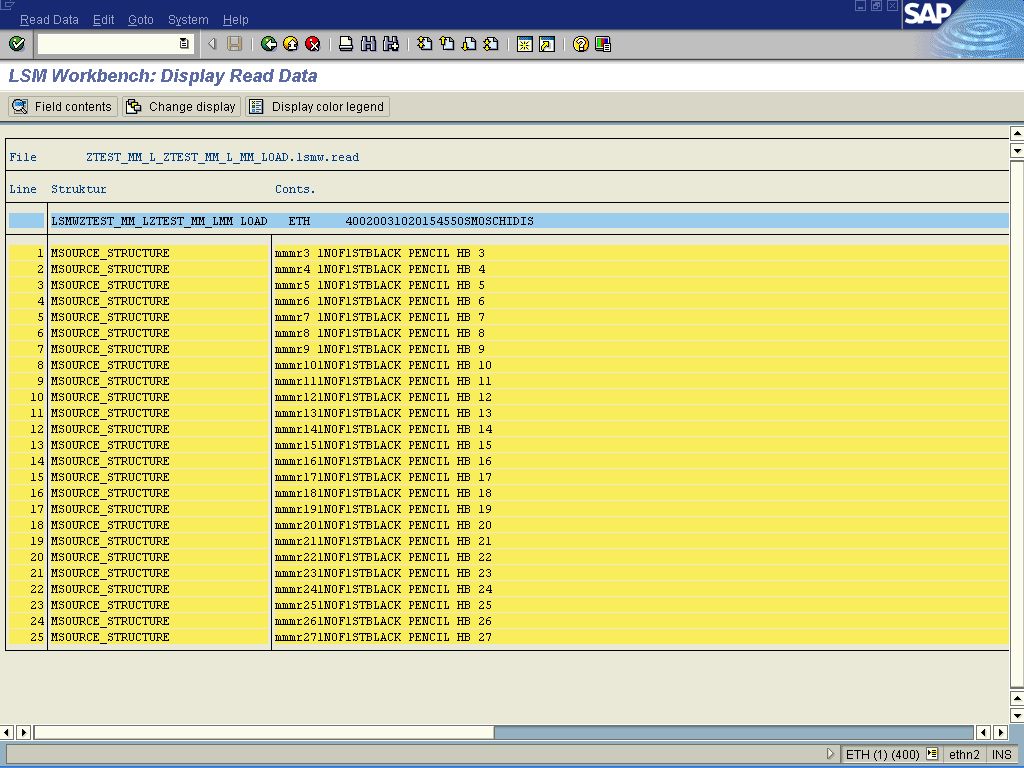
The lines of data read are displayed. Each line can be clicked with the mouse so that the details of data read are displayed. Leave this screen with Back command button.
-
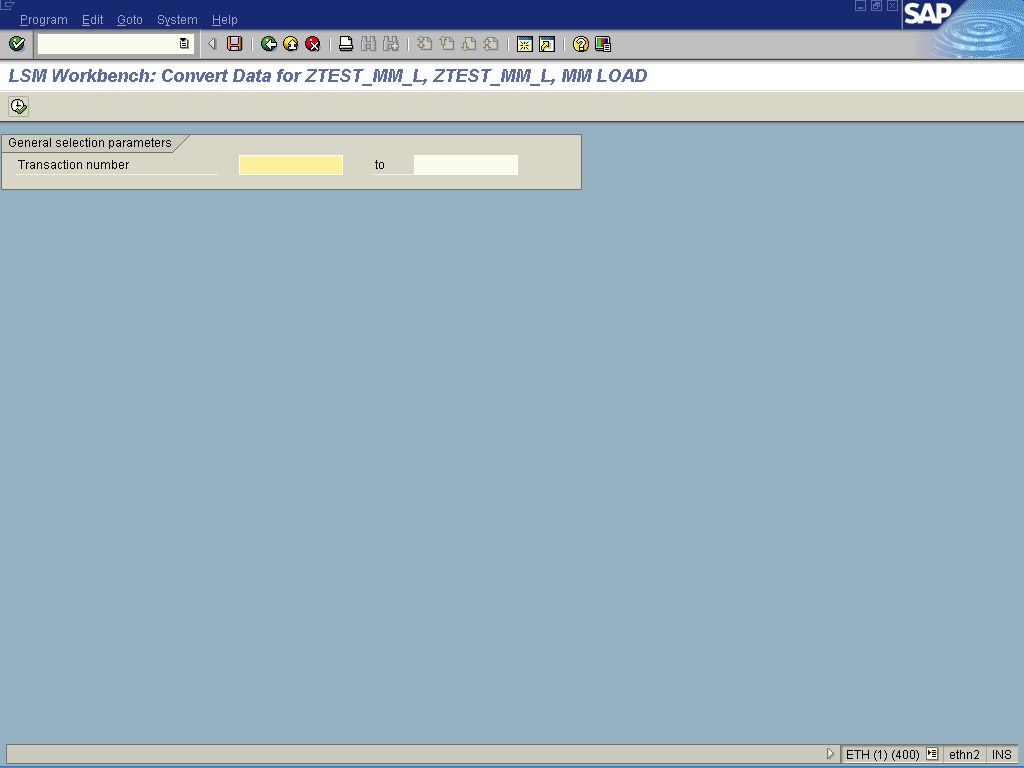
Select the next step, Convert data. On the appearing selection screen press the Execute command button.
-
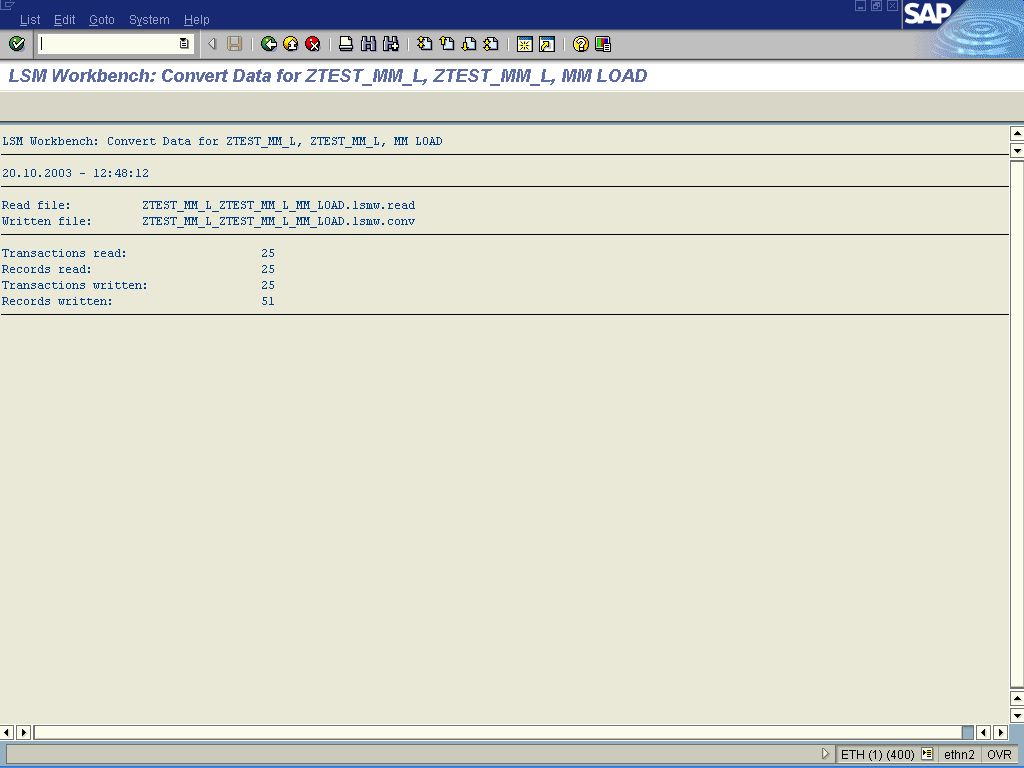
After a while a log of the conversion process is displayed. Leave this screen by pressing the Back command button.
-
Select the next step, Display converted data. A popup screen appears where a range of lines to be displayed can be selected. So, give a range of lines and press the Continue command button.
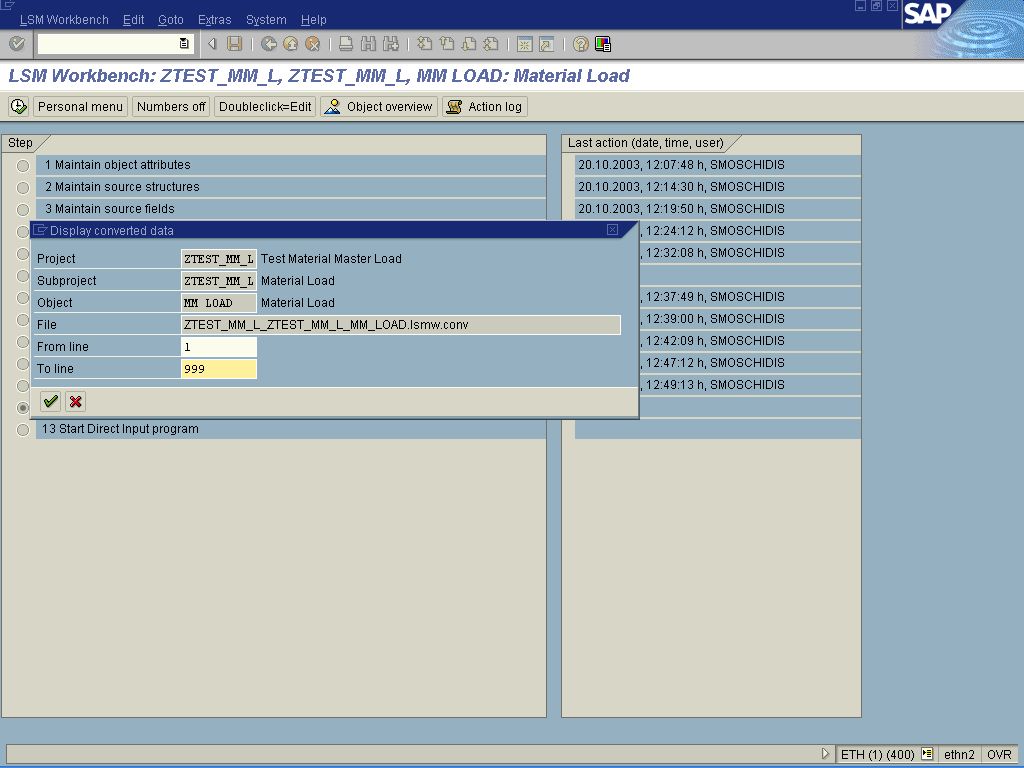
-
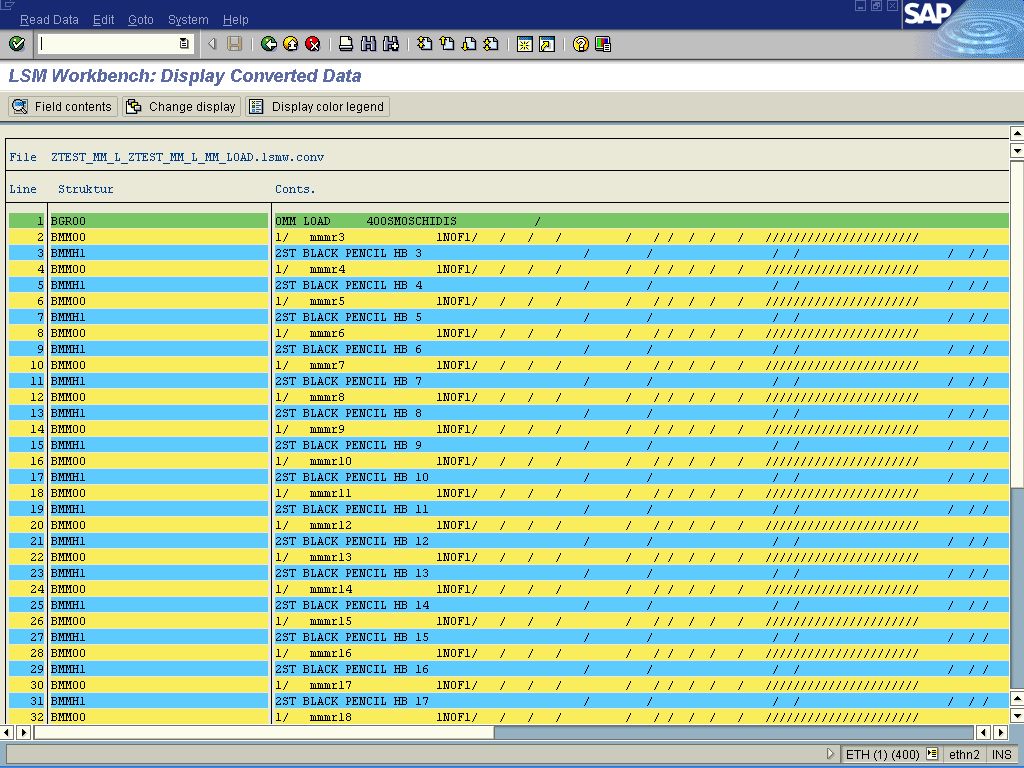
The lines of data converted are displayed. Each line can be clicked with the mouse so that the details of data read are displayed. Leave this screen with Back command button.
-
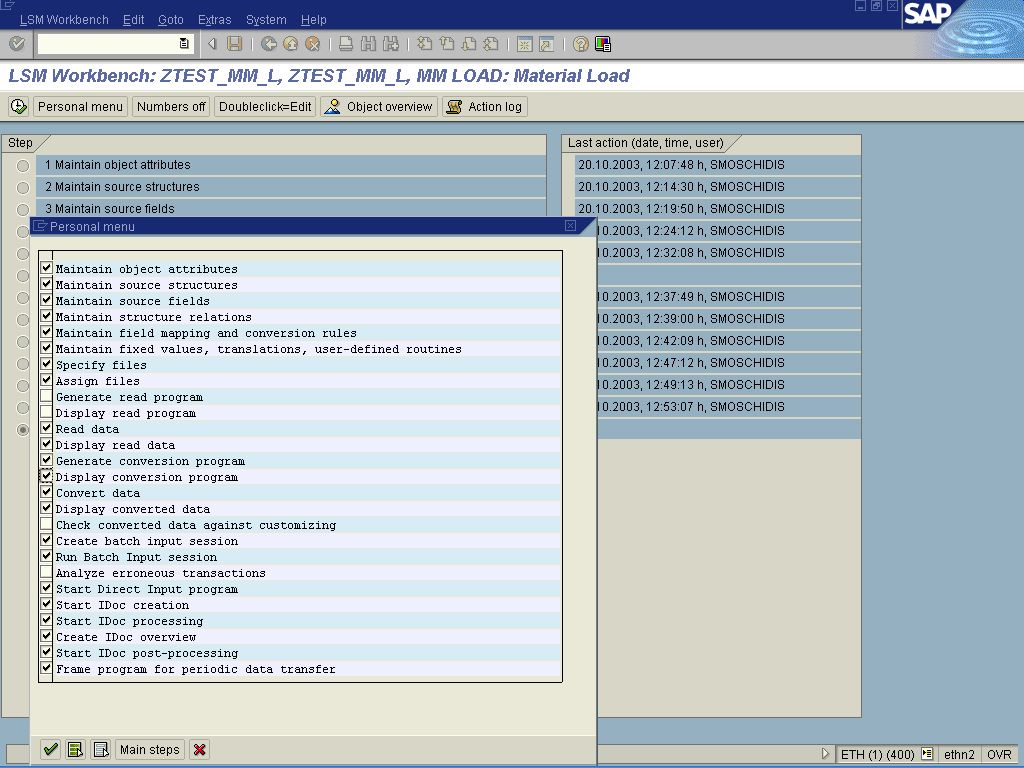
At this point (or at the beginning of the execution of these steps) press the Personal Menu command button and on the appearing popup window check the Generate Conversion Program and Display Conversion Program. Press the Continue command button.
-
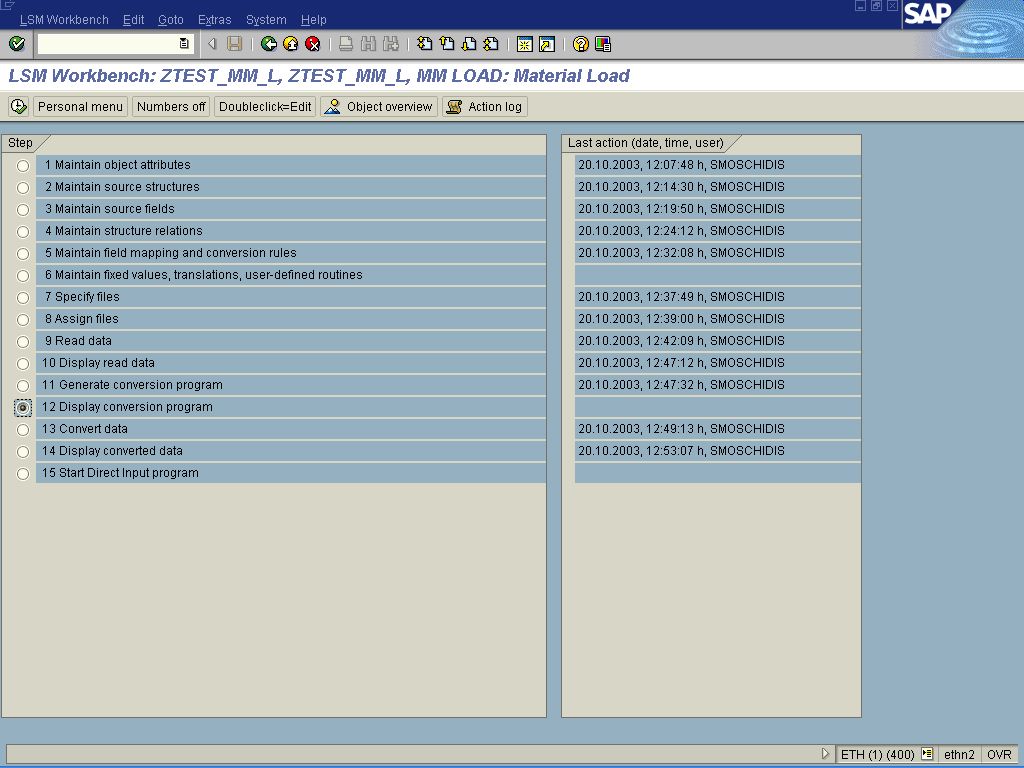
The table of the steps of LSMW is a little different now. It actually contains the two steps selected from the Personal Menu. So, select the Display conversion program step.
-
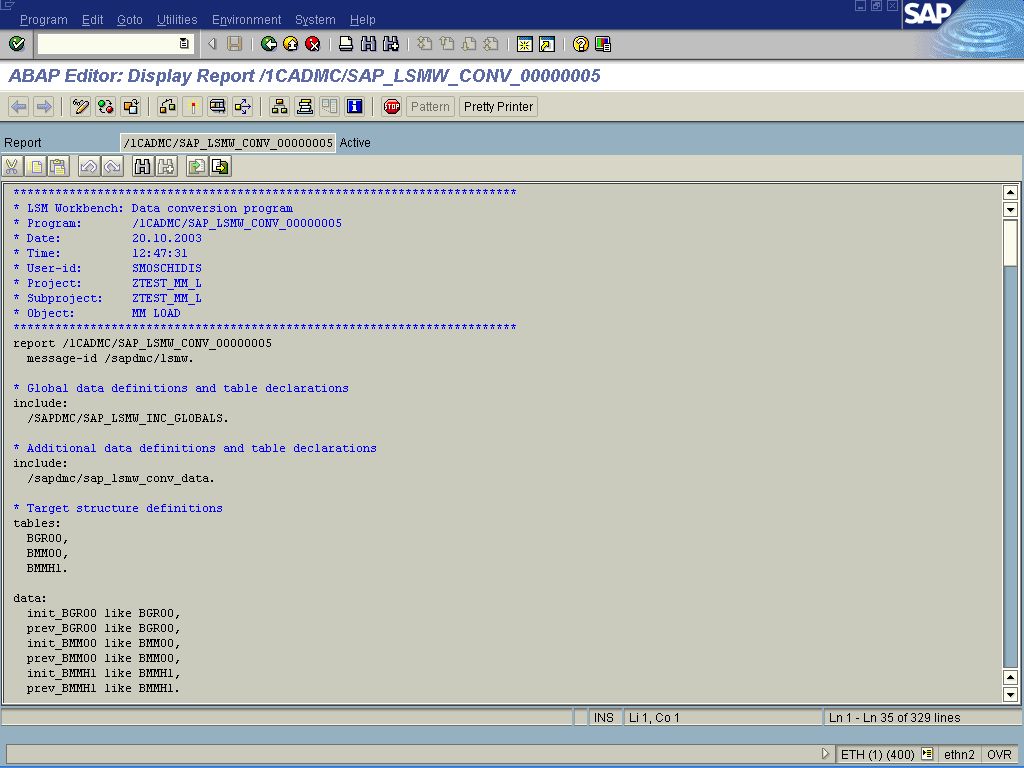
The ABAP editor with the Conversion Program appears. After examining the program leave this screen with the Back command button.
-
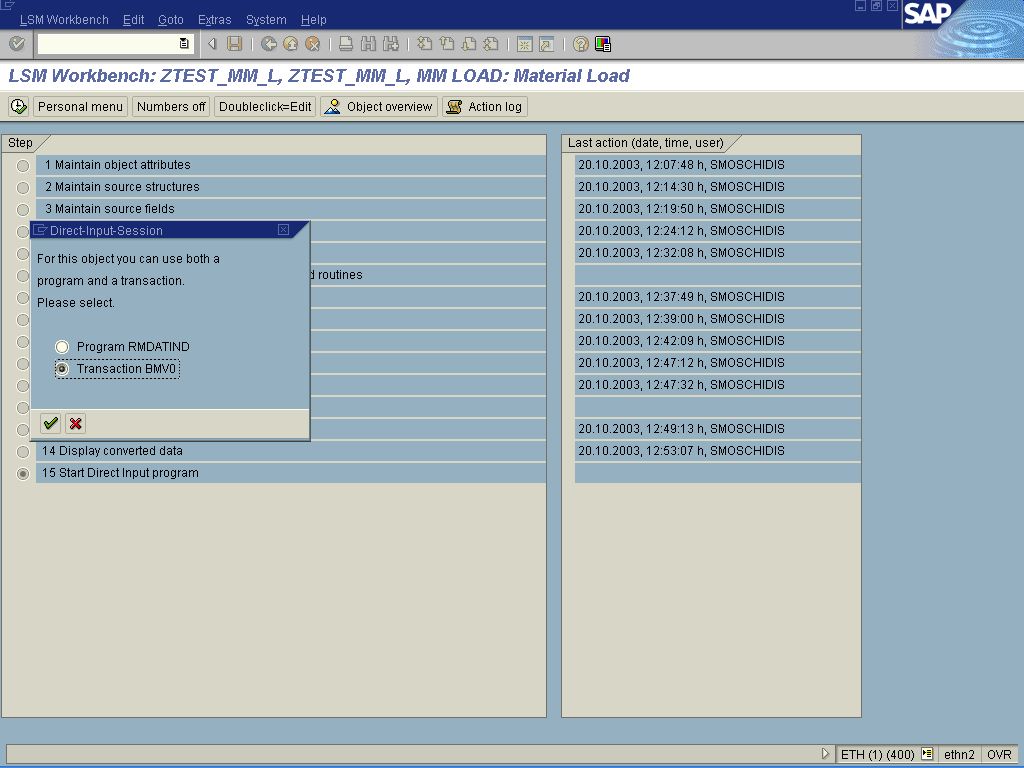
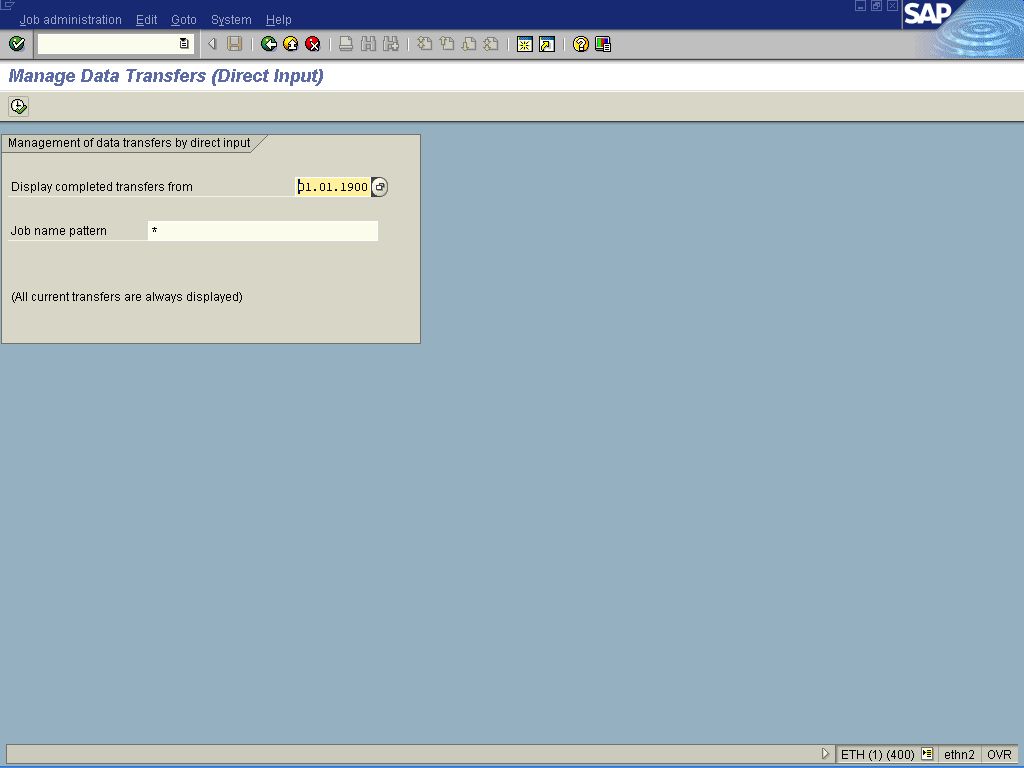
Select the last step, Start Direct Input Program. A popup window appears to select either the DI program or the transaction bmv0 (Administration of Direct Input). It is better to start the bmv0, because these jobs can be restarted if an error occurs.
-
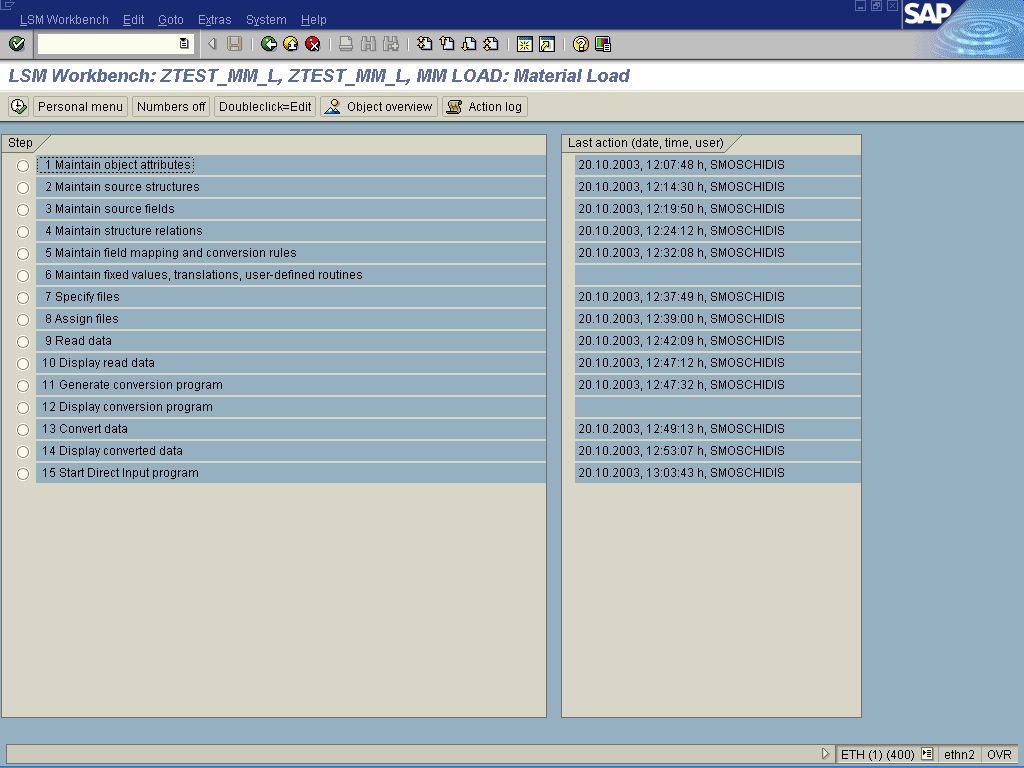
When the Direct input jobs are started and the transaction bmv0 (Direct Input Administration) is quit the LSMW screen appears where all steps have been completed. Press the Back command button.
-
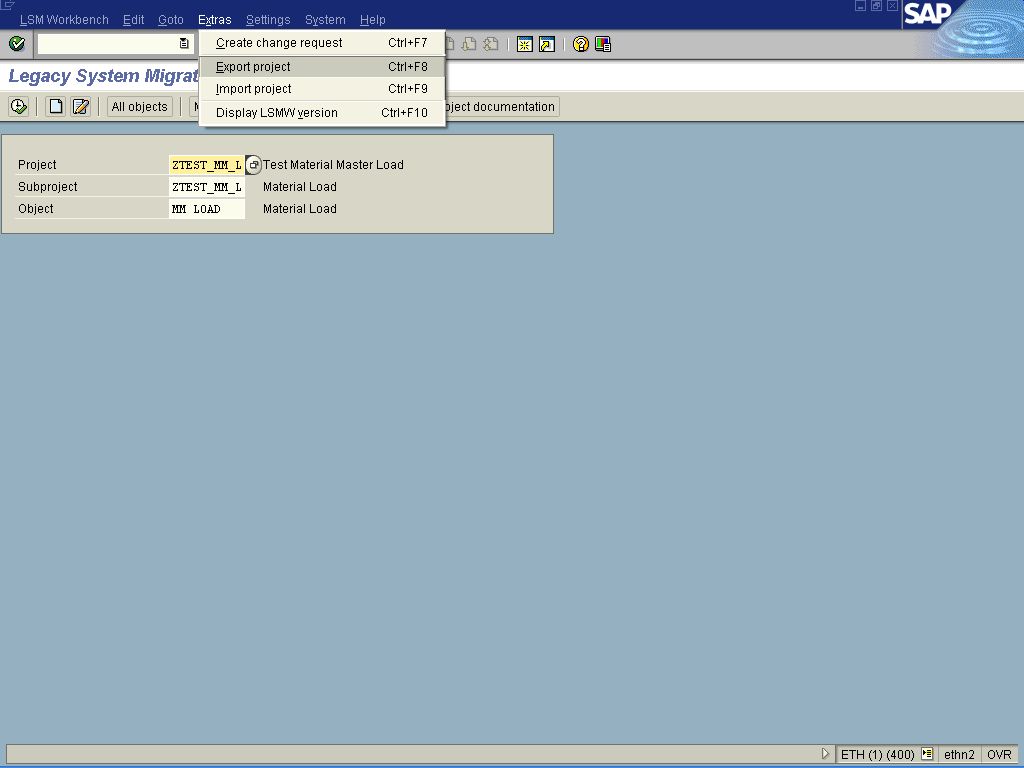
The LSMW project can be downloaded to a local disk and can be uploaded to another SAP system. The download is done from the menu path Extras -> Export Project.
-
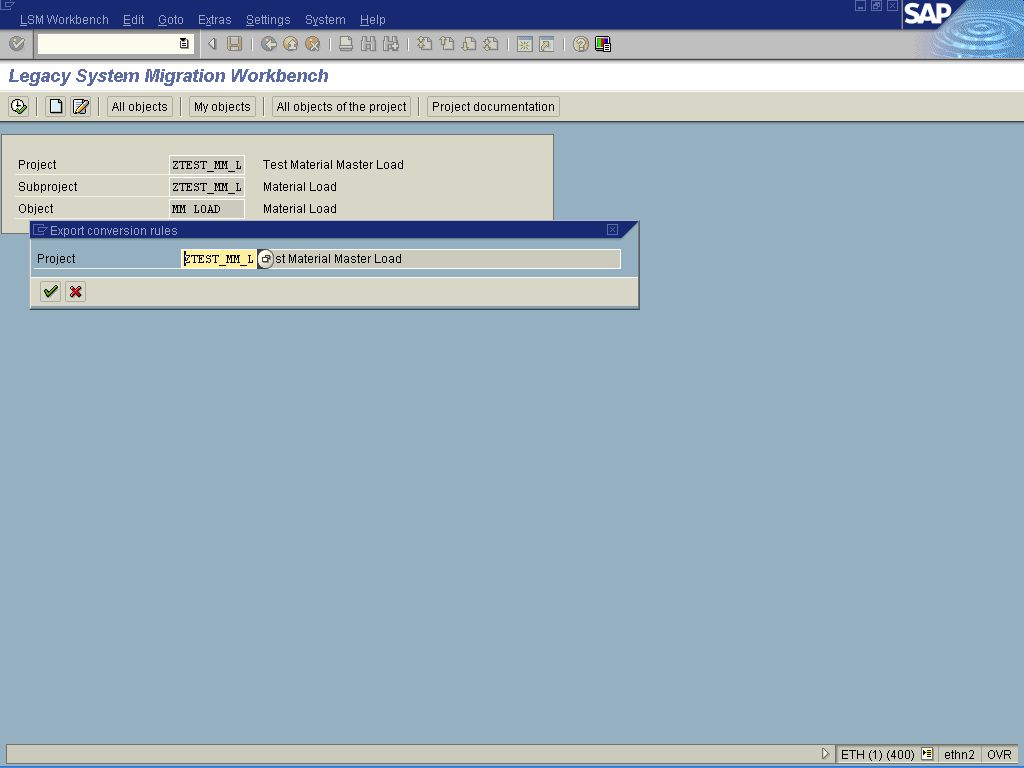
On selection of menu path Extras -> Export Project, a popup window appears. Here specify the project to be exported and press the Continue command button.
-
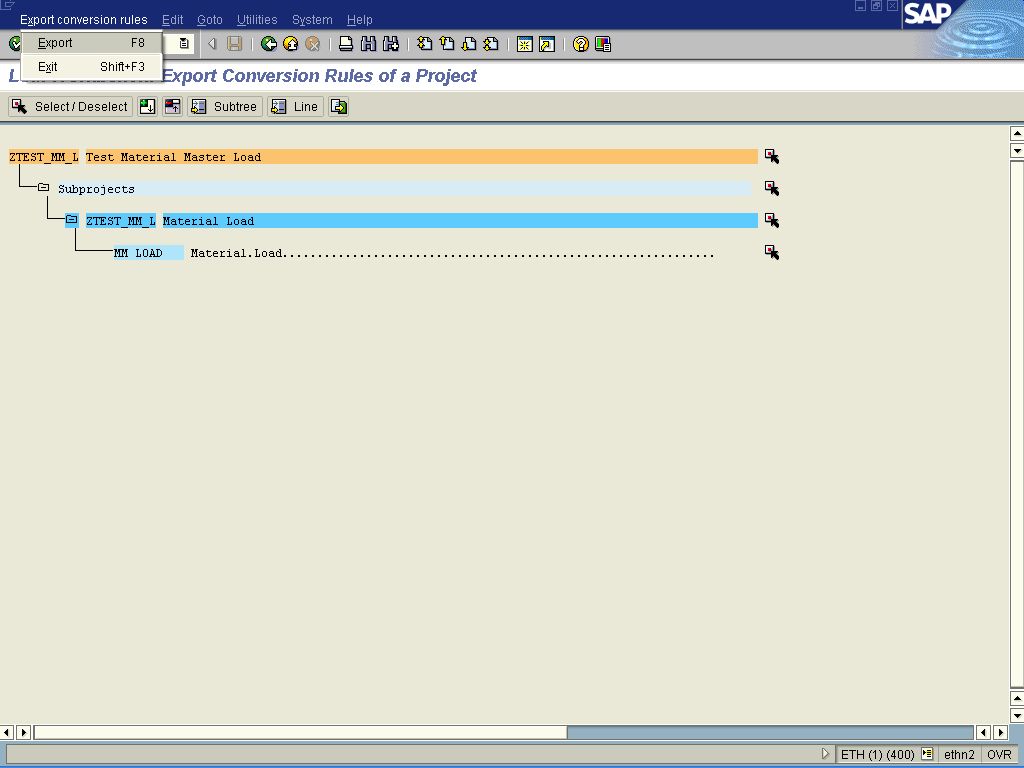
The Export screen appears. Select the menu path Export Conversion Rules -> Export .
-
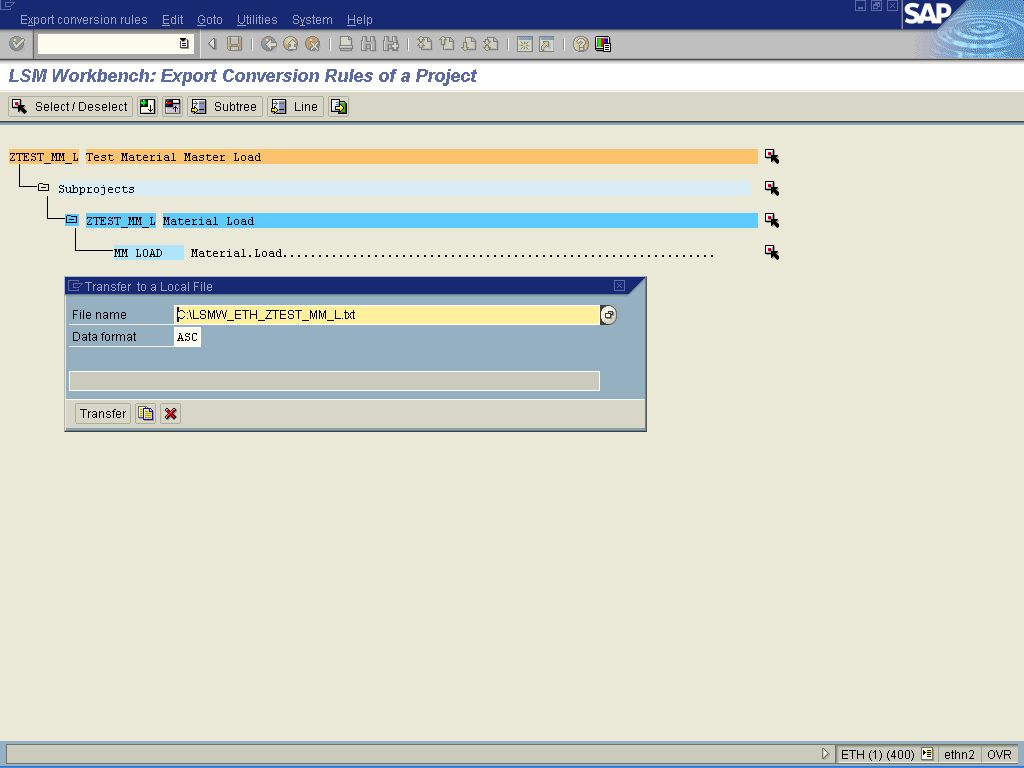
On the appearing popup window type the full path on the File name field and type as Data Format ASC. Press the Transfer command button.
-
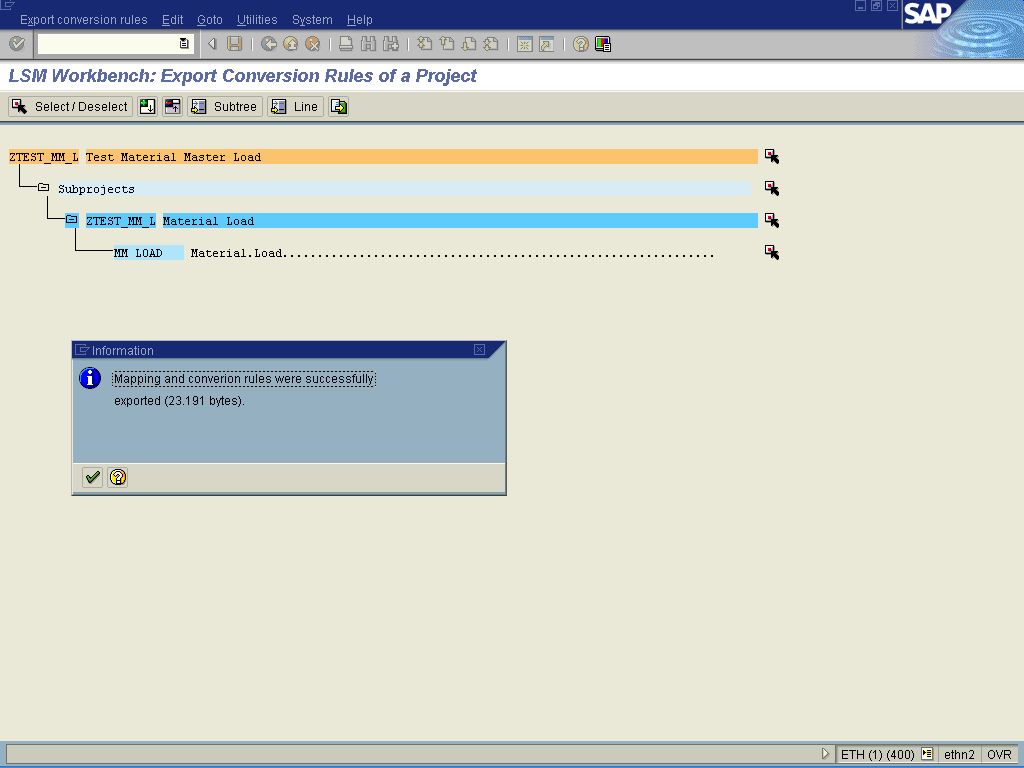
Finally a popup window appears informing of the successful export of the project to the local disk. Quit the transaction LSMW with repeated Back command buttons.